
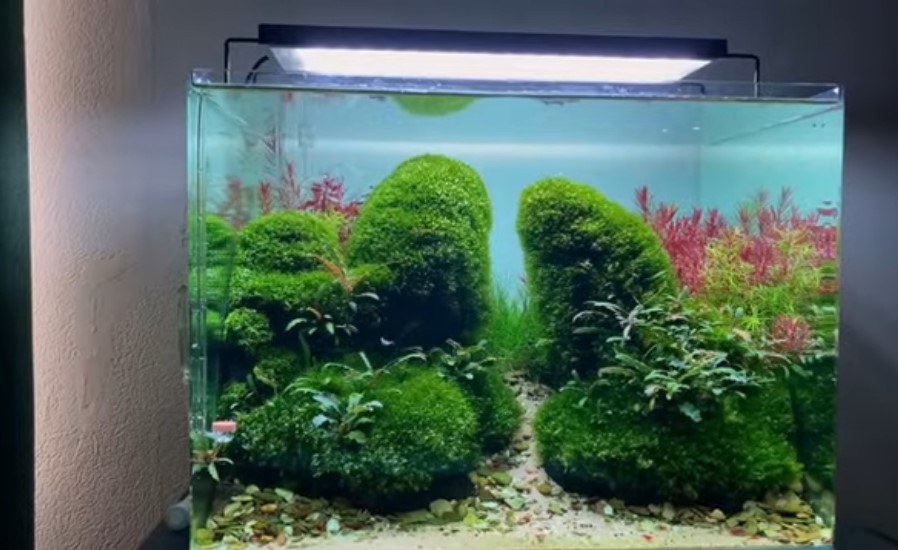
Welcome to the wonderful and rewarding world of fishkeeping! Setting up your first aquarium is an exciting project, but it can also feel overwhelming with all the information available.
The secret to success lies in patience and understanding one crucial fact: you are building an entire ecosystem, not just filling a box with water and fish.
This comprehensive guide is designed to take the confusion out of your first aquarium setup. We’ll walk you through every single step, from choosing the right tank to safely introducing your fish.
By following this methodical process, you’ll create a beautiful, healthy environment for your aquatic pets and avoid the common pitfalls that discourage many beginners.
Step 1: Planning & Choosing Your Aquarium
Before you buy anything, take some time to plan. The decisions you make here will set the foundation for your entire hobby.
Tank Size: Bigger is Actually Easier
It’s a common misconception that a small tank is easier for a beginner. The opposite is true.
- Why bigger is better: A larger volume of water (20 gallons/75 liters or more) is more stable. Waste products like ammonia dilute more easily, and temperature fluctuations happen more slowly. This stability is forgiving of beginner mistakes.
- The Problem with Small Tanks: A 5-gallon tank can become toxic from just a tiny bit of overfeeding or a single missed water change. They require more diligent maintenance.
- Recommendation: For a first-time freshwater setup, a 20-gallon aquarium is the ideal starting point. It offers a great balance of stability, space for a nice community of fish, and manageable maintenance.
Location, Location, Location
Where you place your tank is critical for its health and your enjoyment.
- Sturdy Support: Water is heavy! A gallon weighs about 3 pounds. A 20-gallon tank will weigh over 200 pounds. Ensure you have a dedicated aquarium stand or a incredibly sturdy piece of furniture rated for that weight.
- Avoid Direct Sunlight: Placing your tank in direct sunlight will guarantee a constant battle with unsightly green algae growth.
- Power Access: Ensure you are near electrical outlets for your heater, filter, and light. Use a drip loop to prevent water from traveling down cords and into the outlet.
- Level Floor: Use a level to make sure your tank is perfectly level on its stand. An uneven tank puts stress on the seams and can lead to leaks.
Step 2: Essential Equipment Checklist
You’ll need more than just a tank and water. Here’s the non-negotiable shopping list:
- Aquarium Filter: The heart of your tank’s ecosystem. It removes physical debris and, more importantly, houses beneficial bacteria that break down toxic fish waste.
- Type for Beginners: Hang-On-Back (HOB) filters are excellent for beginners. They are affordable, easy to maintain, and effective.
- Size: Choose a filter rated for at least the size of your tank. If you have a 20-gallon tank, a filter rated for 30 gallons is even better.
- Aquarium Heater: Most tropical fish require stable, warm water.
- Type: Submersible heaters are the standard.
- Wattage: A good rule of thumb is 5 watts per gallon. For a 20-gallon tank, a 100-watt heater is perfect.
- Lighting: Essential for viewing your fish and for live plants.
- For Beginners: The LED light that often comes with a tank kit is sufficient for fish-only or low-light plants.
- Tip: Put your lights on a timer! A consistent light schedule of 6-8 hours per day prevents algae and reduces stress for your fish.
- Substrate: The material on the bottom of your tank.
- Gravel vs. Sand: Washed gravel is the classic, beginner-friendly choice. It’s easy to clean and comes in various colors (natural is always best for showcasing fish).
- How Much? A good depth is about 2 inches. A 20-pound bag is usually enough for a 20-gallon tank.
- Water Conditioner: Tap water contains chlorine and chloramines, which are added to make it safe for us but are deadly to fish and beneficial bacteria. A water conditioner instantly neutralizes these chemicals.
- This is mandatory. Never add tap water to your tank without conditioner.
- Test Kit: This is your window into the invisible water chemistry of your tank. This is not optional.
- Liquid Test Kits: The API Freshwater Master Test Kit is highly recommended. It is more accurate and cost-effective in the long run than test strips. It tests for pH, Ammonia, Nitrite, and Nitrate.
- Other Essentials:
- Net: For safely moving fish.
- Gravel Vacuum/Siphon: The most important tool for water changes.
- Bucket(s): Designated for aquarium use only (no soap or chemicals!).
- Aquarium Thermometer: To monitor the water temperature.
- Fish Food: Research what your chosen fish eat.
Step 3: The Setup & Cycling Process (The Most Important Step!)
This is where beginners must be patient. Do not add fish yet.
1. Install & Arrange
- Rinse your substrate thoroughly in a bucket (without soap) until the water runs clear.
- Place the substrate in the tank.
- Rinse any decorations or rocks with water and arrange them.
- Install your filter and heater, but don’t plug them in yet.
2. Fill with Water
- Place a clean plate or bowl on top of your substrate to prevent it from being disturbed.
- Slowly pour conditioned, room-temperature water onto the plate.
- Fill the tank about halfway.
3. Add Plants
- If using live plants (highly recommended for water quality), now is the time to plant them. Beginner-friendly plants include Java Fern, Anubias, Amazon Sword, and Java Moss.
4. The Nitrogen Cycle: “Cycling Your Tank”
This is the biological process that makes your tank safe for fish. Here’s the simple version:
- Fish produce waste (ammonia), which is highly toxic.
- Beneficial bacteria grow that convert ammonia into nitrite (also toxic).
- Another type of beneficial bacteria grows that converts nitrite into nitrate (less toxic, removed with water changes).
You need to grow these bacteria before you add fish. This process is called cycling.
How to Cycle Your Tank:
- The Fishless Cycle (The Humane & Recommended Method):
- After your tank is set up, turn on your filter and heater.
- Add an ammonia source to feed the bacteria. You can use a few drops of pure ammonia or simply add a pinch of fish food every day to decay.
- Use your test kit every other day. You will watch a predictable pattern:
- Ammonia will spike, then fall.
- Nitrite will spike, then fall.
- Nitrate will rise.
- The cycle is complete when you can add an ammonia source and your test kit reads 0 ppm Ammonia, 0 ppm Nitrite, and some Nitrate within 24 hours.
- This process takes 4-8 weeks. Be patient. Adding fish before the cycle is complete will expose them to poisonous chemicals, causing “New Tank Syndrome,” which is often fatal.
Step 4: Choosing Your Fish
Once your tank is fully cycled, you can finally add fish!
- Start Slowly: Add only a few small, hardy fish at first. This allows the bacterial colony to adjust to the new waste load.
- Research Compatibility: Not all fish get along. Consider:
- Temperament: Will they fight? (e.g., some tetra species can be fin-nippers).
- Water Parameters: Do they require the same pH and temperature?
- Schooling Fish: Many small fish like Tetras and Corydoras need to be in groups of 6+ to feel secure and exhibit natural behavior.
- Excellent Beginner Fish:
- Livebearers: Guppies, Platies, Mollies (easy to care for, colorful).
- Schooling Fish: Zebra Danios, Black Skirt Tetras, White Cloud Mountain Minnows (very hardy).
- Bottom Feeders: Corydoras Catfish (peaceful, fun to watch, great cleanup crew).
- Centerpiece Fish (add last): A single Dwarf Gourami or a Betta Fish (in a suitable community).
Step 5: Adding Fish & Acclimation
You cannot just dump fish from the bag into your tank. You must acclimate them to avoid shock from differences in water chemistry and temperature.
The Float & Drip Method:
- Turn off the aquarium light to reduce stress.
- Float the sealed bag in your aquarium for 15 minutes to equalize the temperature.
- Open the bag and roll down its top to make it float.
- Every 5-10 minutes, add a small cupful of water from your aquarium into the bag.
- After 30-45 minutes, the water in the bag will be mostly from your tank. Gently net the fish out of the bag and release them into the tank. Do not pour the water from the store bag into your tank, as it may contain diseases.
Step 6: Ongoing Maintenance
A clean tank is a healthy tank. A simple routine is all it takes.
- Weekly Water Changes: Every week, change 10-25% of the tank’s water.
- Use your gravel vacuum to siphon water into a bucket. Push the vacuum into the gravel to remove waste trapped underneath.
- Prepare new water in a separate bucket. Heat it to match the tank temperature and add the correct dose of water conditioner.
- Slowly pour the new, conditioned water into the tank.
- Filter Maintenance: Never replace all your filter media at once! This is where most of your beneficial bacteria live. Once a month, rinse the filter sponges/media in the old tank water you removed during a water change to remove gunk without killing the bacteria.
- Testing: Continue to test your water weekly for the first few months to ensure everything remains stable.
- Feeding: Feed only a small amount of food that your fish can consume in 2 minutes, once or twice a day. Overfeeding is the #1 cause of poor water quality.
Enjoy Your New Hobby
Setting up your first aquarium is a journey of learning and patience. By investing time in planning, cycling your tank properly, and committing to simple maintenance, you are setting yourself up for a incredibly rewarding experience.
There’s nothing quite like the tranquility of a beautifully maintained aquarium and the joy of watching a healthy ecosystem you created thrive. Welcome to the club!
This other amazing post, “The Ultimate Guide to Choosing the Best Dog Food for Your Labrador Retriever”, might interest you. Check it out!
I hope you enjoyed this article, which focuses on “Aquarium Setup for Beginners: Your Step-by-Step Guide to a Thriving First Tank”. You can share your thoughts and experiences with me in the comments section.